Petzl Footape
Add to wishlist
Petzl Footape
$39.99
- Sold By: Petzl
- Categories Climbing Gear, Hardware, Slings and Webbing
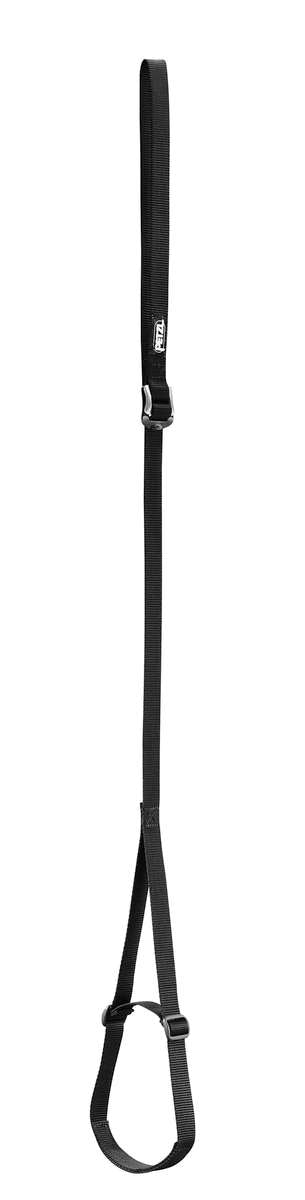
Adjustable webbing foot loop
The adjustable FOOTAPE foot loop is used with the ASCENSION handled ascender for rope ascents.
DESCRIPTION:
• Attaches to the ASCENSION ascender for rope ascents
• Underfoot strap is abrasion-resistant and is slightly rigid to make it easier to step into
• Adjustable elastic keeps the foot in the foot loop with any type of shoe
• DoubleBack buckle easily and quickly adjusts length of foot loop
SPECIFICATIONS:
• Material(s): nylon, steel
• Weight: 65 g
More Products by Petzl
Related Products
{"id":3942434209879,"title":"Edelrid Cord - Powerloc Expert SP","handle":"edelrid-cord-powerloc","description":"\u003cp\u003eEDELRID’s classic, very hard-wearing accessory cord with low elongation and excellent knotability.\u003c\/p\u003e\r\n\u003cp\u003eDescription:\u003cbr\u003e• Improved knotability due to special sheath construction\u003cbr\u003e• The number of horizontal stripes indicates the diameter of the accessory cord\u003c\/p\u003e\r\n\u003cp\u003eWeight (g\/meter): \u003cbr\u003e• 4 mm: 10\u003cbr\u003e• 5 mm: 15\u003cbr\u003e• 6 mm: 25\u003cbr\u003e• 7 mm: 32\u003cbr\u003e• 8 mm: 41\u003c\/p\u003e\r\n\u003cp\u003eLoad Capacity (Kn):\u003cbr\u003e• 4 mm: 4\u003cbr\u003e• 5 mm: 6\u003cbr\u003e• 6 mm: 8\u003cbr\u003e• 7 mm: 14\u003cbr\u003e• 8 mm: 16\u003c\/p\u003e","published_at":"2021-02-11T14:07:25+13:00","created_at":"2019-08-09T13:38:29+12:00","vendor":"Edlerid","type":"climb","tags":["cord","rope sling"],"price":249,"price_min":249,"price_max":489,"available":true,"price_varies":true,"compare_at_price":null,"compare_at_price_min":0,"compare_at_price_max":0,"compare_at_price_varies":false,"variants":[{"id":29469303767127,"title":"5mm","option1":"5mm","option2":null,"option3":null,"sku":"PR736","requires_shipping":true,"taxable":true,"featured_image":null,"available":true,"name":"Edelrid Cord - Powerloc Expert SP - 5mm","public_title":"5mm","options":["5mm"],"price":249,"weight":0,"compare_at_price":null,"inventory_quantity":22,"inventory_management":"shopify","inventory_policy":"deny","barcode":null},{"id":29469303799895,"title":"6mm","option1":"6mm","option2":null,"option3":null,"sku":"PR941158222","requires_shipping":true,"taxable":true,"featured_image":{"id":11994097025111,"product_id":3942434209879,"position":4,"created_at":"2019-08-09T13:38:33+12:00","updated_at":"2021-02-11T14:07:26+13:00","alt":"Powerloc_Cord_RV7SD1RHN1RE_7b8de266-5a7e-4d3c-b7f0-2c8ffd3111ae_RWXQEX265W9A.jpg","width":815,"height":1000,"src":"https:\/\/cdn.shopify.com\/s\/files\/1\/1149\/7718\/products\/Powerloc_Cord_RV7SD1RHN1RE_7b8de266-5a7e-4d3c-b7f0-2c8ffd3111ae_RWXQEX265W9A.jpg?v=1613005646","variant_ids":[29469303799895,29469303832663,29469303865431]},"available":true,"name":"Edelrid Cord - Powerloc Expert SP - 6mm","public_title":"6mm","options":["6mm"],"price":309,"weight":0,"compare_at_price":null,"inventory_quantity":41,"inventory_management":"shopify","inventory_policy":"deny","barcode":null,"featured_media":{"alt":"Powerloc_Cord_RV7SD1RHN1RE_7b8de266-5a7e-4d3c-b7f0-2c8ffd3111ae_RWXQEX265W9A.jpg","id":1069153255511,"position":3,"preview_image":{"aspect_ratio":0.815,"height":1000,"width":815,"src":"https:\/\/cdn.shopify.com\/s\/files\/1\/1149\/7718\/products\/Powerloc_Cord_RV7SD1RHN1RE_7b8de266-5a7e-4d3c-b7f0-2c8ffd3111ae_RWXQEX265W9A.jpg?v=1569122897"}}},{"id":29469303832663,"title":"7mm","option1":"7mm","option2":null,"option3":null,"sku":"PR941159103","requires_shipping":true,"taxable":true,"featured_image":{"id":11994097025111,"product_id":3942434209879,"position":4,"created_at":"2019-08-09T13:38:33+12:00","updated_at":"2021-02-11T14:07:26+13:00","alt":"Powerloc_Cord_RV7SD1RHN1RE_7b8de266-5a7e-4d3c-b7f0-2c8ffd3111ae_RWXQEX265W9A.jpg","width":815,"height":1000,"src":"https:\/\/cdn.shopify.com\/s\/files\/1\/1149\/7718\/products\/Powerloc_Cord_RV7SD1RHN1RE_7b8de266-5a7e-4d3c-b7f0-2c8ffd3111ae_RWXQEX265W9A.jpg?v=1613005646","variant_ids":[29469303799895,29469303832663,29469303865431]},"available":true,"name":"Edelrid Cord - Powerloc Expert SP - 7mm","public_title":"7mm","options":["7mm"],"price":389,"weight":0,"compare_at_price":null,"inventory_quantity":42,"inventory_management":"shopify","inventory_policy":"deny","barcode":null,"featured_media":{"alt":"Powerloc_Cord_RV7SD1RHN1RE_7b8de266-5a7e-4d3c-b7f0-2c8ffd3111ae_RWXQEX265W9A.jpg","id":1069153255511,"position":3,"preview_image":{"aspect_ratio":0.815,"height":1000,"width":815,"src":"https:\/\/cdn.shopify.com\/s\/files\/1\/1149\/7718\/products\/Powerloc_Cord_RV7SD1RHN1RE_7b8de266-5a7e-4d3c-b7f0-2c8ffd3111ae_RWXQEX265W9A.jpg?v=1569122897"}}},{"id":29469303865431,"title":"8mm","option1":"8mm","option2":null,"option3":null,"sku":"PR941159104","requires_shipping":true,"taxable":true,"featured_image":{"id":11994097025111,"product_id":3942434209879,"position":4,"created_at":"2019-08-09T13:38:33+12:00","updated_at":"2021-02-11T14:07:26+13:00","alt":"Powerloc_Cord_RV7SD1RHN1RE_7b8de266-5a7e-4d3c-b7f0-2c8ffd3111ae_RWXQEX265W9A.jpg","width":815,"height":1000,"src":"https:\/\/cdn.shopify.com\/s\/files\/1\/1149\/7718\/products\/Powerloc_Cord_RV7SD1RHN1RE_7b8de266-5a7e-4d3c-b7f0-2c8ffd3111ae_RWXQEX265W9A.jpg?v=1613005646","variant_ids":[29469303799895,29469303832663,29469303865431]},"available":true,"name":"Edelrid Cord - Powerloc Expert SP - 8mm","public_title":"8mm","options":["8mm"],"price":489,"weight":0,"compare_at_price":null,"inventory_quantity":44,"inventory_management":"shopify","inventory_policy":"deny","barcode":null,"featured_media":{"alt":"Powerloc_Cord_RV7SD1RHN1RE_7b8de266-5a7e-4d3c-b7f0-2c8ffd3111ae_RWXQEX265W9A.jpg","id":1069153255511,"position":3,"preview_image":{"aspect_ratio":0.815,"height":1000,"width":815,"src":"https:\/\/cdn.shopify.com\/s\/files\/1\/1149\/7718\/products\/Powerloc_Cord_RV7SD1RHN1RE_7b8de266-5a7e-4d3c-b7f0-2c8ffd3111ae_RWXQEX265W9A.jpg?v=1569122897"}}}],"images":["\/\/cdn.shopify.com\/s\/files\/1\/1149\/7718\/products\/Edelrid_cord_4mm_to_8mm_ROQFW28W1RHE.jpg?v=1583371174","\/\/cdn.shopify.com\/s\/files\/1\/1149\/7718\/products\/Powerloc_Cord_RV7SD1RHN1RE_RWXQEWG7MZ99.jpg?v=1613005646","\/\/cdn.shopify.com\/s\/files\/1\/1149\/7718\/products\/Powerloc_Cord_RV7SD1RHN1RE_7b8de266-5a7e-4d3c-b7f0-2c8ffd3111ae_RWXQEX265W9A.jpg?v=1613005646"],"featured_image":"\/\/cdn.shopify.com\/s\/files\/1\/1149\/7718\/products\/Edelrid_cord_4mm_to_8mm_ROQFW28W1RHE.jpg?v=1583371174","options":["Diameter"],"media":[{"alt":"Edelrid_cord_4mm_to_8mm_ROQFW28W1RHE.jpg","id":1069153222743,"position":1,"preview_image":{"aspect_ratio":1.46,"height":411,"width":600,"src":"https:\/\/cdn.shopify.com\/s\/files\/1\/1149\/7718\/products\/Edelrid_cord_4mm_to_8mm_ROQFW28W1RHE.jpg?v=1569122897"},"aspect_ratio":1.46,"height":411,"media_type":"image","src":"https:\/\/cdn.shopify.com\/s\/files\/1\/1149\/7718\/products\/Edelrid_cord_4mm_to_8mm_ROQFW28W1RHE.jpg?v=1569122897","width":600},{"alt":"Powerloc_Cord_RV7SD1RHN1RE_RWXQEWG7MZ99.jpg","id":1069153189975,"position":2,"preview_image":{"aspect_ratio":0.815,"height":1000,"width":815,"src":"https:\/\/cdn.shopify.com\/s\/files\/1\/1149\/7718\/products\/Powerloc_Cord_RV7SD1RHN1RE_RWXQEWG7MZ99.jpg?v=1569122897"},"aspect_ratio":0.815,"height":1000,"media_type":"image","src":"https:\/\/cdn.shopify.com\/s\/files\/1\/1149\/7718\/products\/Powerloc_Cord_RV7SD1RHN1RE_RWXQEWG7MZ99.jpg?v=1569122897","width":815},{"alt":"Powerloc_Cord_RV7SD1RHN1RE_7b8de266-5a7e-4d3c-b7f0-2c8ffd3111ae_RWXQEX265W9A.jpg","id":1069153255511,"position":3,"preview_image":{"aspect_ratio":0.815,"height":1000,"width":815,"src":"https:\/\/cdn.shopify.com\/s\/files\/1\/1149\/7718\/products\/Powerloc_Cord_RV7SD1RHN1RE_7b8de266-5a7e-4d3c-b7f0-2c8ffd3111ae_RWXQEX265W9A.jpg?v=1569122897"},"aspect_ratio":0.815,"height":1000,"media_type":"image","src":"https:\/\/cdn.shopify.com\/s\/files\/1\/1149\/7718\/products\/Powerloc_Cord_RV7SD1RHN1RE_7b8de266-5a7e-4d3c-b7f0-2c8ffd3111ae_RWXQEX265W9A.jpg?v=1569122897","width":815}],"content":"\u003cp\u003eEDELRID’s classic, very hard-wearing accessory cord with low elongation and excellent knotability.\u003c\/p\u003e\r\n\u003cp\u003eDescription:\u003cbr\u003e• Improved knotability due to special sheath construction\u003cbr\u003e• The number of horizontal stripes indicates the diameter of the accessory cord\u003c\/p\u003e\r\n\u003cp\u003eWeight (g\/meter): \u003cbr\u003e• 4 mm: 10\u003cbr\u003e• 5 mm: 15\u003cbr\u003e• 6 mm: 25\u003cbr\u003e• 7 mm: 32\u003cbr\u003e• 8 mm: 41\u003c\/p\u003e\r\n\u003cp\u003eLoad Capacity (Kn):\u003cbr\u003e• 4 mm: 4\u003cbr\u003e• 5 mm: 6\u003cbr\u003e• 6 mm: 8\u003cbr\u003e• 7 mm: 14\u003cbr\u003e• 8 mm: 16\u003c\/p\u003e"}
You may also like:
Edelrid Cord - Powerloc Expert SP
EDELRID’s classic, very hard-wearing accessory cord with low elongation and excellent knotability. Description:• Improved knotability...
$2.49
{"id":1390556577879,"title":"Metolius Refilable Chalk Ball","handle":"metolius-refilable-chalk-ball","description":"\u003cp\u003eDon't throw this chalk sock out when it's empty—refillable design allows you to keep the sock full for years of use\u003cbr\u003eSynthetic fabric allows easy flow for excellent coverage\u003c\/p\u003e","published_at":"2018-10-04T16:23:58+13:00","created_at":"2018-10-04T16:23:58+13:00","vendor":"Metolius","type":"climb","tags":["chalk","extra"],"price":899,"price_min":899,"price_max":899,"available":true,"price_varies":false,"compare_at_price":null,"compare_at_price_min":0,"compare_at_price_max":0,"compare_at_price_varies":false,"variants":[{"id":12676394451031,"title":"Default","option1":"Default","option2":null,"option3":null,"sku":"PR941158303","requires_shipping":true,"taxable":true,"featured_image":{"id":3812773822551,"product_id":1390556577879,"position":1,"created_at":"2018-10-04T16:24:02+13:00","updated_at":"2019-12-10T11:49:28+13:00","alt":"b8a1b5a9-0020-4fdc-8e86-579b508bc971_RW2BSLPTTR6G.jpg","width":596,"height":588,"src":"https:\/\/cdn.shopify.com\/s\/files\/1\/1149\/7718\/products\/b8a1b5a9-0020-4fdc-8e86-579b508bc971_RW2BSLPTTR6G.jpg?v=1575931768","variant_ids":[12676394451031]},"available":true,"name":"Metolius Refilable Chalk Ball","public_title":null,"options":["Default"],"price":899,"weight":0,"compare_at_price":null,"inventory_quantity":2,"inventory_management":"shopify","inventory_policy":"deny","barcode":null,"featured_media":{"alt":"b8a1b5a9-0020-4fdc-8e86-579b508bc971_RW2BSLPTTR6G.jpg","id":818439258199,"position":1,"preview_image":{"aspect_ratio":1.014,"height":588,"width":596,"src":"https:\/\/cdn.shopify.com\/s\/files\/1\/1149\/7718\/products\/b8a1b5a9-0020-4fdc-8e86-579b508bc971_RW2BSLPTTR6G.jpg?v=1569072059"}}}],"images":["\/\/cdn.shopify.com\/s\/files\/1\/1149\/7718\/products\/b8a1b5a9-0020-4fdc-8e86-579b508bc971_RW2BSLPTTR6G.jpg?v=1575931768"],"featured_image":"\/\/cdn.shopify.com\/s\/files\/1\/1149\/7718\/products\/b8a1b5a9-0020-4fdc-8e86-579b508bc971_RW2BSLPTTR6G.jpg?v=1575931768","options":["Default"],"media":[{"alt":"b8a1b5a9-0020-4fdc-8e86-579b508bc971_RW2BSLPTTR6G.jpg","id":818439258199,"position":1,"preview_image":{"aspect_ratio":1.014,"height":588,"width":596,"src":"https:\/\/cdn.shopify.com\/s\/files\/1\/1149\/7718\/products\/b8a1b5a9-0020-4fdc-8e86-579b508bc971_RW2BSLPTTR6G.jpg?v=1569072059"},"aspect_ratio":1.014,"height":588,"media_type":"image","src":"https:\/\/cdn.shopify.com\/s\/files\/1\/1149\/7718\/products\/b8a1b5a9-0020-4fdc-8e86-579b508bc971_RW2BSLPTTR6G.jpg?v=1569072059","width":596}],"content":"\u003cp\u003eDon't throw this chalk sock out when it's empty—refillable design allows you to keep the sock full for years of use\u003cbr\u003eSynthetic fabric allows easy flow for excellent coverage\u003c\/p\u003e"}
You may also like:
Metolius Refilable Chalk Ball
Don't throw this chalk sock out when it's empty—refillable design allows you to keep the...
$8.99
{"id":4618141401175,"title":"Mount Owen Rock Climbs","handle":"mount-owen-rock-climbs","description":"\u003cp\u003eMount Owen limestone varies considerably across the areas described in this guide. The faces are generally featured with sloping blocks and edges and the odd tufa or flowstone. Rock can be prickly sharp like the ‘cauliflower’ rock on some climbs in Fyfe River Gorge, pure ‘blank’ friction like the slabs of Sanctuary Dome or razor sharp like some pitches on the marble-like walls of Staircase Crag.\u003cbr\u003e\u003cbr\u003eMore than half the climbs in this guide are in Fyfe River Gorge. Climbers have been active here for over 15 years and the Intergalactic Wall now offers some of the toughest steep limestone test pieces in New Zealand.\u003cbr\u003e\u003cbr\u003eOn the other side of the mountain accessed from Courthouse Flat are Gold Strike and Granity Pass. Gold Strike is a sport crag with some excellent qualities: good rock, full length pitches and walls that stay dry in the rain. The Main Wall makes a fine winter crag.\u003cbr\u003e\u003cbr\u003eMore than a dozen established multi-pitch climbs are covered by this guide. A handful of these are in Fyfe River Gorge but Staircase Crag up near Granity Pass offers the full package. Stay overnight in the Granity Pass DOC hut and sample the steep exposed walls of Staircase Crag as well as clean slabs of Sanctuary Dome. Go ahead and tag the summit of Mount Owen while you are up there.\u003cbr\u003e\u003cbr\u003eFull colour – 80 pages – printed in New Zealand – spiral bound\u003cbr\u003eISBN: 978-0-995-13873-5\u003c\/p\u003e","published_at":"2020-09-17T13:17:57+12:00","created_at":"2020-09-17T13:17:57+12:00","vendor":"Kiwi Tracks and Guides","type":"climb","tags":["extra","guide"],"price":4000,"price_min":4000,"price_max":4000,"available":true,"price_varies":false,"compare_at_price":null,"compare_at_price_min":0,"compare_at_price_max":0,"compare_at_price_varies":false,"variants":[{"id":32348292972631,"title":"Default","option1":"Default","option2":null,"option3":null,"sku":"PR941160039","requires_shipping":true,"taxable":true,"featured_image":{"id":14578261360727,"product_id":4618141401175,"position":1,"created_at":"2020-09-17T13:17:59+12:00","updated_at":"2020-09-17T13:17:59+12:00","alt":"Mount-Owen-Rock-Climbs_SDT6SP7Z5O0Z.jpg","width":437,"height":620,"src":"https:\/\/cdn.shopify.com\/s\/files\/1\/1149\/7718\/products\/Mount-Owen-Rock-Climbs_SDT6SP7Z5O0Z.jpg?v=1600305479","variant_ids":[32348292972631]},"available":true,"name":"Mount Owen Rock Climbs","public_title":null,"options":["Default"],"price":4000,"weight":0,"compare_at_price":null,"inventory_quantity":3,"inventory_management":"shopify","inventory_policy":"deny","barcode":"9780995138735","featured_media":{"alt":null,"id":6751776145495,"position":1,"preview_image":{"aspect_ratio":0.705,"height":620,"width":437,"src":"https:\/\/cdn.shopify.com\/s\/files\/1\/1149\/7718\/products\/Mount-Owen-Rock-Climbs_SDT6SP7Z5O0Z.jpg?v=1600305479"}}}],"images":["\/\/cdn.shopify.com\/s\/files\/1\/1149\/7718\/products\/Mount-Owen-Rock-Climbs_SDT6SP7Z5O0Z.jpg?v=1600305479"],"featured_image":"\/\/cdn.shopify.com\/s\/files\/1\/1149\/7718\/products\/Mount-Owen-Rock-Climbs_SDT6SP7Z5O0Z.jpg?v=1600305479","options":["Default"],"media":[{"alt":null,"id":6751776145495,"position":1,"preview_image":{"aspect_ratio":0.705,"height":620,"width":437,"src":"https:\/\/cdn.shopify.com\/s\/files\/1\/1149\/7718\/products\/Mount-Owen-Rock-Climbs_SDT6SP7Z5O0Z.jpg?v=1600305479"},"aspect_ratio":0.705,"height":620,"media_type":"image","src":"https:\/\/cdn.shopify.com\/s\/files\/1\/1149\/7718\/products\/Mount-Owen-Rock-Climbs_SDT6SP7Z5O0Z.jpg?v=1600305479","width":437}],"content":"\u003cp\u003eMount Owen limestone varies considerably across the areas described in this guide. The faces are generally featured with sloping blocks and edges and the odd tufa or flowstone. Rock can be prickly sharp like the ‘cauliflower’ rock on some climbs in Fyfe River Gorge, pure ‘blank’ friction like the slabs of Sanctuary Dome or razor sharp like some pitches on the marble-like walls of Staircase Crag.\u003cbr\u003e\u003cbr\u003eMore than half the climbs in this guide are in Fyfe River Gorge. Climbers have been active here for over 15 years and the Intergalactic Wall now offers some of the toughest steep limestone test pieces in New Zealand.\u003cbr\u003e\u003cbr\u003eOn the other side of the mountain accessed from Courthouse Flat are Gold Strike and Granity Pass. Gold Strike is a sport crag with some excellent qualities: good rock, full length pitches and walls that stay dry in the rain. The Main Wall makes a fine winter crag.\u003cbr\u003e\u003cbr\u003eMore than a dozen established multi-pitch climbs are covered by this guide. A handful of these are in Fyfe River Gorge but Staircase Crag up near Granity Pass offers the full package. Stay overnight in the Granity Pass DOC hut and sample the steep exposed walls of Staircase Crag as well as clean slabs of Sanctuary Dome. Go ahead and tag the summit of Mount Owen while you are up there.\u003cbr\u003e\u003cbr\u003eFull colour – 80 pages – printed in New Zealand – spiral bound\u003cbr\u003eISBN: 978-0-995-13873-5\u003c\/p\u003e"}
You may also like:
Mount Owen Rock Climbs
Mount Owen limestone varies considerably across the areas described in this guide. The faces are...
$40.00
{"id":4527643033687,"title":"Mad Rock Trigger Wire Carabiner","handle":"mad-rock-trigger-wire-carabiner","description":"\u003cp\u003eHere, a specialized \"trigger\" holds the gate open until the slightest pressure is applied(as when a rope is dumped into the open gate). Also available in a quickdraw set up, the Trigger Wire is an innovative addition to your rack, ideal for desperate clips, use with a stick clip, or as a cheater biner when hanging those draws.\u003cbr\u003e\u003cbr\u003eTech Specs:\u003cbr\u003e• Weight: 38 g\u003cbr\u003e• Major Axis: 23 kN\u003cbr\u003e• Minor Axis: 8 kN\u003cbr\u003e• Open Gate: 8 kN\u003cbr\u003e• Gate Clearance: 22 mm\u003cbr\u003e• Length: 95 mm\u003cbr\u003e• Material: aluminum \u003cbr\u003e• Certification: CE EN 12275 type K, B, H\u003cbr\u003e• Hot Forged\u003c\/p\u003e","published_at":"2020-05-27T16:05:48+12:00","created_at":"2020-05-27T16:05:48+12:00","vendor":"Mad Rock","type":"climb","tags":["carabiner","hardware"],"price":1999,"price_min":1999,"price_max":1999,"available":true,"price_varies":false,"compare_at_price":null,"compare_at_price_min":0,"compare_at_price_max":0,"compare_at_price_varies":false,"variants":[{"id":32063297028183,"title":"Default","option1":"Default","option2":null,"option3":null,"sku":"PR941159592","requires_shipping":true,"taxable":true,"featured_image":{"id":14132970717271,"product_id":4527643033687,"position":1,"created_at":"2020-05-27T16:05:52+12:00","updated_at":"2020-05-27T16:05:52+12:00","alt":"MRTRIG_S6HJYSRO01AM.jpg","width":900,"height":900,"src":"https:\/\/cdn.shopify.com\/s\/files\/1\/1149\/7718\/products\/MRTRIG_S6HJYSRO01AM.jpg?v=1590552352","variant_ids":[32063297028183]},"available":true,"name":"Mad Rock Trigger Wire Carabiner","public_title":null,"options":["Default"],"price":1999,"weight":0,"compare_at_price":null,"inventory_quantity":3,"inventory_management":"shopify","inventory_policy":"deny","barcode":"0870559022316","featured_media":{"alt":null,"id":6306165358679,"position":1,"preview_image":{"aspect_ratio":1.0,"height":900,"width":900,"src":"https:\/\/cdn.shopify.com\/s\/files\/1\/1149\/7718\/products\/MRTRIG_S6HJYSRO01AM.jpg?v=1590552352"}}}],"images":["\/\/cdn.shopify.com\/s\/files\/1\/1149\/7718\/products\/MRTRIG_S6HJYSRO01AM.jpg?v=1590552352","\/\/cdn.shopify.com\/s\/files\/1\/1149\/7718\/products\/trigger_S6HJZFMFDP86.jpg?v=1590552352"],"featured_image":"\/\/cdn.shopify.com\/s\/files\/1\/1149\/7718\/products\/MRTRIG_S6HJYSRO01AM.jpg?v=1590552352","options":["Default"],"media":[{"alt":null,"id":6306165358679,"position":1,"preview_image":{"aspect_ratio":1.0,"height":900,"width":900,"src":"https:\/\/cdn.shopify.com\/s\/files\/1\/1149\/7718\/products\/MRTRIG_S6HJYSRO01AM.jpg?v=1590552352"},"aspect_ratio":1.0,"height":900,"media_type":"image","src":"https:\/\/cdn.shopify.com\/s\/files\/1\/1149\/7718\/products\/MRTRIG_S6HJYSRO01AM.jpg?v=1590552352","width":900},{"alt":null,"id":6306165391447,"position":2,"preview_image":{"aspect_ratio":1.0,"height":500,"width":500,"src":"https:\/\/cdn.shopify.com\/s\/files\/1\/1149\/7718\/products\/trigger_S6HJZFMFDP86.jpg?v=1590552352"},"aspect_ratio":1.0,"height":500,"media_type":"image","src":"https:\/\/cdn.shopify.com\/s\/files\/1\/1149\/7718\/products\/trigger_S6HJZFMFDP86.jpg?v=1590552352","width":500}],"content":"\u003cp\u003eHere, a specialized \"trigger\" holds the gate open until the slightest pressure is applied(as when a rope is dumped into the open gate). Also available in a quickdraw set up, the Trigger Wire is an innovative addition to your rack, ideal for desperate clips, use with a stick clip, or as a cheater biner when hanging those draws.\u003cbr\u003e\u003cbr\u003eTech Specs:\u003cbr\u003e• Weight: 38 g\u003cbr\u003e• Major Axis: 23 kN\u003cbr\u003e• Minor Axis: 8 kN\u003cbr\u003e• Open Gate: 8 kN\u003cbr\u003e• Gate Clearance: 22 mm\u003cbr\u003e• Length: 95 mm\u003cbr\u003e• Material: aluminum \u003cbr\u003e• Certification: CE EN 12275 type K, B, H\u003cbr\u003e• Hot Forged\u003c\/p\u003e"}
You may also like:
Mad Rock Trigger Wire Carabiner
Here, a specialized "trigger" holds the gate open until the slightest pressure is applied(as when...
$19.99
{"id":4360133476439,"title":"Black Diamond Mojo Zip Chalk Bag","handle":"black-diamond-mojo-zip-chalk-bag","description":"\u003ch2 class=\"noshow-320\"\u003eDESCRIPTION\u003c\/h2\u003e\r\n\u003cp\u003e\u003cspan\u003eOur classic, cylinder-shaped chalk bag with a pliable wire rim and reinforced TPU lower, the Black Diamond Mojo Zip Chalk Bag also features a rear zippered pocket that holds small essentials like your keys, a route topo or a smartphone. The included webbing belt with a quick-release buckle provides fast on and off.\u003cbr\u003e\u003cbr\u003e\u003c\/span\u003e\u003c\/p\u003e\r\n\u003cul\u003e\r\n\u003cli\u003eClassic cylinder shape with pliable wire rim and TPU abrasion-resistant lower\u003c\/li\u003e\r\n\u003cli\u003eZippered pocket for keys, route topo or smartphone\u003c\/li\u003e\r\n\u003cli\u003eFleece-lined interior with cinching cord-lock closure\u003c\/li\u003e\r\n\u003cli\u003eBrush holder\u003c\/li\u003e\r\n\u003cli\u003eWebbing belt with quick-release buckle\u003c\/li\u003e\r\n\u003c\/ul\u003e\r\n\u003ch2 class=\"noshow-320\"\u003eTECH SPECS\u003c\/h2\u003e\r\n\u003cdiv class=\"mobileTechToggle\"\u003e\r\n\u003cdiv class=\"attributeItem first\"\u003e\r\n\u003cul\u003e\r\n\u003cli\u003e\n\u003cspan class=\"attributeName\"\u003eWeight: \u003c\/span\u003e\u003cspan class=\"attributeName\"\u003e90 g (3.2 oz)\u003c\/span\u003e\n\u003c\/li\u003e\r\n\u003c\/ul\u003e\r\n\u003cp\u003e \u003c\/p\u003e\r\n\u003c\/div\u003e\r\n\u003c\/div\u003e","published_at":"2019-11-21T14:23:17+13:00","created_at":"2019-11-21T14:23:17+13:00","vendor":"Black Diamond","type":"climb","tags":["chalk bag","extra"],"price":3999,"price_min":3999,"price_max":3999,"available":true,"price_varies":false,"compare_at_price":null,"compare_at_price_min":0,"compare_at_price_max":0,"compare_at_price_varies":false,"variants":[{"id":32490586177623,"title":"Astral Blue","option1":"Astral Blue","option2":null,"option3":null,"sku":"PR941159718","requires_shipping":true,"taxable":true,"featured_image":{"id":14981230854231,"product_id":4360133476439,"position":3,"created_at":"2021-02-13T11:24:35+13:00","updated_at":"2021-02-13T11:24:53+13:00","alt":"Mojo_zip_astral_blue_S7N4H0CAK3J1.jpg","width":750,"height":675,"src":"https:\/\/cdn.shopify.com\/s\/files\/1\/1149\/7718\/products\/Mojo_zip_astral_blue_S7N4H0CAK3J1.jpg?v=1613168693","variant_ids":[32490586177623]},"available":true,"name":"Black Diamond Mojo Zip Chalk Bag - Astral Blue","public_title":"Astral Blue","options":["Astral Blue"],"price":3999,"weight":0,"compare_at_price":null,"inventory_quantity":1,"inventory_management":"shopify","inventory_policy":"deny","barcode":"0793661402657","featured_media":{"alt":null,"id":7160493539415,"position":3,"preview_image":{"aspect_ratio":1.111,"height":675,"width":750,"src":"https:\/\/cdn.shopify.com\/s\/files\/1\/1149\/7718\/products\/Mojo_zip_astral_blue_S7N4H0CAK3J1.jpg?v=1613168675"}}},{"id":31217020633175,"title":"Forest\/Slate","option1":"Forest\/Slate","option2":null,"option3":null,"sku":"PR941159598","requires_shipping":true,"taxable":true,"featured_image":{"id":14981230886999,"product_id":4360133476439,"position":2,"created_at":"2021-02-13T11:24:35+13:00","updated_at":"2021-02-13T11:25:09+13:00","alt":"mojo_zip_forest_S6P4DP1X3QIT.jpg","width":1000,"height":1000,"src":"https:\/\/cdn.shopify.com\/s\/files\/1\/1149\/7718\/products\/mojo_zip_forest_S6P4DP1X3QIT.jpg?v=1613168709","variant_ids":[31217020633175]},"available":false,"name":"Black Diamond Mojo Zip Chalk Bag - Forest\/Slate","public_title":"Forest\/Slate","options":["Forest\/Slate"],"price":3999,"weight":0,"compare_at_price":null,"inventory_quantity":0,"inventory_management":"shopify","inventory_policy":"deny","barcode":"0793661402596","featured_media":{"alt":null,"id":7160493572183,"position":2,"preview_image":{"aspect_ratio":1.0,"height":1000,"width":1000,"src":"https:\/\/cdn.shopify.com\/s\/files\/1\/1149\/7718\/products\/mojo_zip_forest_S6P4DP1X3QIT.jpg?v=1613168675"}}},{"id":31217020665943,"title":"Black\/Slate","option1":"Black\/Slate","option2":null,"option3":null,"sku":"PR941159595","requires_shipping":true,"taxable":true,"featured_image":{"id":14981230919767,"product_id":4360133476439,"position":1,"created_at":"2021-02-13T11:24:35+13:00","updated_at":"2021-02-13T11:25:09+13:00","alt":"Mojo_Zip_Black_S6P46BJMI22H.jpg","width":1000,"height":1000,"src":"https:\/\/cdn.shopify.com\/s\/files\/1\/1149\/7718\/products\/Mojo_Zip_Black_S6P46BJMI22H.jpg?v=1613168709","variant_ids":[31217020665943]},"available":false,"name":"Black Diamond Mojo Zip Chalk Bag - Black\/Slate","public_title":"Black\/Slate","options":["Black\/Slate"],"price":3999,"weight":0,"compare_at_price":null,"inventory_quantity":0,"inventory_management":"shopify","inventory_policy":"deny","barcode":"0793661402633","featured_media":{"alt":null,"id":7160493604951,"position":1,"preview_image":{"aspect_ratio":1.0,"height":1000,"width":1000,"src":"https:\/\/cdn.shopify.com\/s\/files\/1\/1149\/7718\/products\/Mojo_Zip_Black_S6P46BJMI22H.jpg?v=1613168675"}}}],"images":["\/\/cdn.shopify.com\/s\/files\/1\/1149\/7718\/products\/Mojo_Zip_Black_S6P46BJMI22H.jpg?v=1613168709","\/\/cdn.shopify.com\/s\/files\/1\/1149\/7718\/products\/mojo_zip_forest_S6P4DP1X3QIT.jpg?v=1613168709","\/\/cdn.shopify.com\/s\/files\/1\/1149\/7718\/products\/Mojo_zip_astral_blue_S7N4H0CAK3J1.jpg?v=1613168693"],"featured_image":"\/\/cdn.shopify.com\/s\/files\/1\/1149\/7718\/products\/Mojo_Zip_Black_S6P46BJMI22H.jpg?v=1613168709","options":["Colour"],"media":[{"alt":null,"id":7160493604951,"position":1,"preview_image":{"aspect_ratio":1.0,"height":1000,"width":1000,"src":"https:\/\/cdn.shopify.com\/s\/files\/1\/1149\/7718\/products\/Mojo_Zip_Black_S6P46BJMI22H.jpg?v=1613168675"},"aspect_ratio":1.0,"height":1000,"media_type":"image","src":"https:\/\/cdn.shopify.com\/s\/files\/1\/1149\/7718\/products\/Mojo_Zip_Black_S6P46BJMI22H.jpg?v=1613168675","width":1000},{"alt":null,"id":7160493572183,"position":2,"preview_image":{"aspect_ratio":1.0,"height":1000,"width":1000,"src":"https:\/\/cdn.shopify.com\/s\/files\/1\/1149\/7718\/products\/mojo_zip_forest_S6P4DP1X3QIT.jpg?v=1613168675"},"aspect_ratio":1.0,"height":1000,"media_type":"image","src":"https:\/\/cdn.shopify.com\/s\/files\/1\/1149\/7718\/products\/mojo_zip_forest_S6P4DP1X3QIT.jpg?v=1613168675","width":1000},{"alt":null,"id":7160493539415,"position":3,"preview_image":{"aspect_ratio":1.111,"height":675,"width":750,"src":"https:\/\/cdn.shopify.com\/s\/files\/1\/1149\/7718\/products\/Mojo_zip_astral_blue_S7N4H0CAK3J1.jpg?v=1613168675"},"aspect_ratio":1.111,"height":675,"media_type":"image","src":"https:\/\/cdn.shopify.com\/s\/files\/1\/1149\/7718\/products\/Mojo_zip_astral_blue_S7N4H0CAK3J1.jpg?v=1613168675","width":750}],"content":"\u003ch2 class=\"noshow-320\"\u003eDESCRIPTION\u003c\/h2\u003e\r\n\u003cp\u003e\u003cspan\u003eOur classic, cylinder-shaped chalk bag with a pliable wire rim and reinforced TPU lower, the Black Diamond Mojo Zip Chalk Bag also features a rear zippered pocket that holds small essentials like your keys, a route topo or a smartphone. The included webbing belt with a quick-release buckle provides fast on and off.\u003cbr\u003e\u003cbr\u003e\u003c\/span\u003e\u003c\/p\u003e\r\n\u003cul\u003e\r\n\u003cli\u003eClassic cylinder shape with pliable wire rim and TPU abrasion-resistant lower\u003c\/li\u003e\r\n\u003cli\u003eZippered pocket for keys, route topo or smartphone\u003c\/li\u003e\r\n\u003cli\u003eFleece-lined interior with cinching cord-lock closure\u003c\/li\u003e\r\n\u003cli\u003eBrush holder\u003c\/li\u003e\r\n\u003cli\u003eWebbing belt with quick-release buckle\u003c\/li\u003e\r\n\u003c\/ul\u003e\r\n\u003ch2 class=\"noshow-320\"\u003eTECH SPECS\u003c\/h2\u003e\r\n\u003cdiv class=\"mobileTechToggle\"\u003e\r\n\u003cdiv class=\"attributeItem first\"\u003e\r\n\u003cul\u003e\r\n\u003cli\u003e\n\u003cspan class=\"attributeName\"\u003eWeight: \u003c\/span\u003e\u003cspan class=\"attributeName\"\u003e90 g (3.2 oz)\u003c\/span\u003e\n\u003c\/li\u003e\r\n\u003c\/ul\u003e\r\n\u003cp\u003e \u003c\/p\u003e\r\n\u003c\/div\u003e\r\n\u003c\/div\u003e"}
You may also like:
Black Diamond Mojo Zip Chalk Bag
DESCRIPTION Our classic, cylinder-shaped chalk bag with a pliable wire rim and reinforced TPU lower,...
$39.99